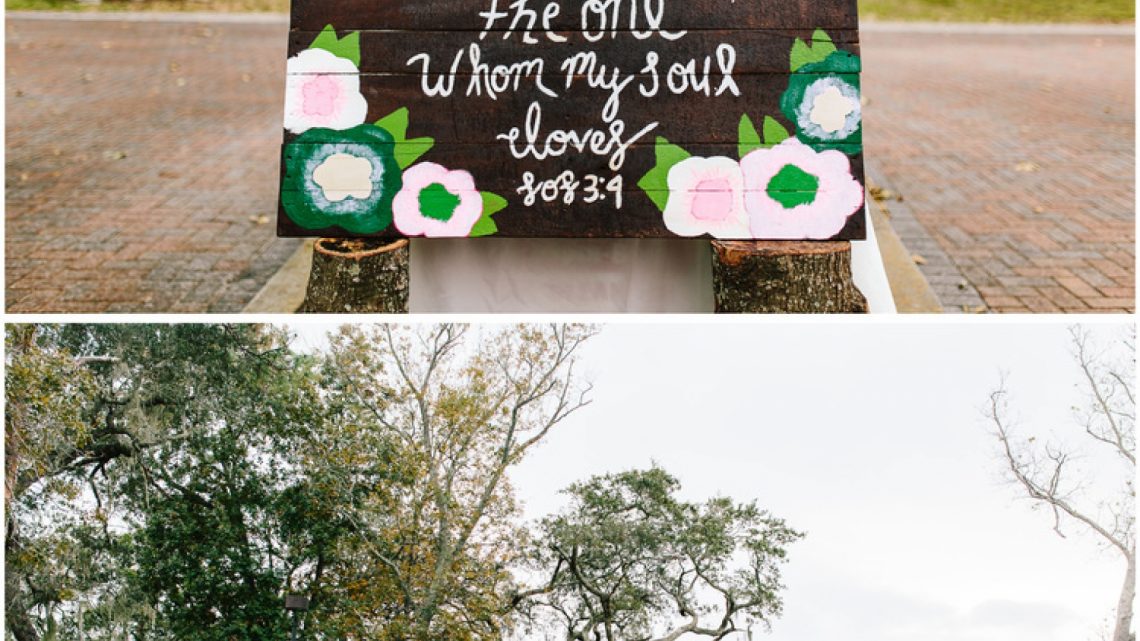
 There is nothing that gets me more excited than seeing my artwork displayed in person! Ok, maybe chocolate and ice cream but anything I create is close on the scale right next to any delicious dessert food! Pictured above is the Do It Yourself Pallet Board I made for my best friend Alyssa at her outside wedding reception. It was the first decoration you saw when you walked from the church to the outside reception! I originally made the pallet to match her Bridal Shower decor and hoped she could then use it to decorate her first apartment. You can see pictures of her Bridal Shower and how I used the pallet board to decorate here. The pallet board was such a fun project and one of my favorite DIY’s I’ve ever done!

Just a minute from my house is a Tropical Smoothie and behind the building are always tons of leftover pallet boards sitting by the trash just waiting to be claimed by people like me. I persuaded my sister one day to come with me to grab one of boards. It was quite an adventure, as it always is when I’m with her, but we successfully picked up the perfect board and put it in my Jeep to get it safely home. My dad was such a trooper with the whole project. He helped me to re-frame the board and condense the wood together to make a solid background. The nails are no joke to remove without splitting the wood. Gloves for preventing splinters and a ply bar + hammer is a must. What would take my dad 5 minutes to pull out a few nails surely took me more than 20.
The actual making of the “new” pallet board was carefully nailed together by my dad, but after that it was all mine! The first thing I had to do was sand the raw wood. It took me an hour or so and I used a Sheet Sander. Once that was done I wanted to stain the board. Originally I thought I wanted the stain to be lighter to bring out the natural wood color but I went with a dark stain called Rust-Oleum Wood Stain (dark walnut) I bought at JoAnn’s because that was the only color they had and I didn’t want to make another trip to Hobby Lobby (talk about lazy ahahah). If I were to do it again, I’d most likely go lighter, but I am still really happy with the contrasted color of the dark background and colorful flowers.
Last I pained a clear coat to give it a glossy finish and protect it from Florida’s humidity and weather. I had to search high and low for a clear coat that would allow me to paint over the stain and acrylic paint without messing up either of those. Luckily the people over at Home Depot had exactly what I was looking for and were super helpful.


Once the pallet was stained and ready to go, I had my friend Lucy come over and help me sketch out the design and words I was going to use. She the best artist, you can check out her Instagram here. We played around with a few designs and decided that 3 flowers clumped together in each corner looked the best. Once the flowers were sketched, my sister, Lucy and I grabbed a paint brush and started painting away. The flowers were the easy part. What I really needed help with was writing the letters for the Song of Solomon 3:4 verse I wanted written on the board. Lucy did a great job on that and once she was done sketching in pencil, I painted over the cursive words with plain white acrylic paint.


For the wedding I actually ended up painting over the original flower colors to match Alyssa and Isaac’s wedding colors better and added more details to the center of each flower. I loved how our Bridesmaid dressed matched the board colors so well!
 Steps to make a DIY Pallet Board:
1. Find a board.
2. Use a pry bar to lift all staples out. Remove all slats except one to keep the wood frame together underneath.
3. Condense all slats together and leave no space between. Nail together with a nail gun.
4. Saw off excess wood frame once all slats are condensed.
5. Sand the whole new pallet board to make sure there are no rough edges or splinters.
6. Stain the board using a wood stain. I used 2 coats of Rust Oleum Wood Stain (dark walnut) and patted it with a towel after each stroke. I patted to allow the natural wood color to still come through.
7. Paint the desired design you want on your board. I used Acrylic Craft paint from Hobby Lobby, JoAnns and Michael’s). My favorite brand is Folk Art and can be bought at all 3 of those craft stores but I honestly just buy what is cheapest or the color that matches the best.
8. Paint a clear finish on your board. I used Miniwax Water Based Polycrylic Protective Finish. It’s important that you find a finish that you can use with both oil and water-based stains. If I were to use an acrylic finish, I would have risked smearing the Acrylic paint and that is the last thing I wanted to do was ruin my design!
No Comments